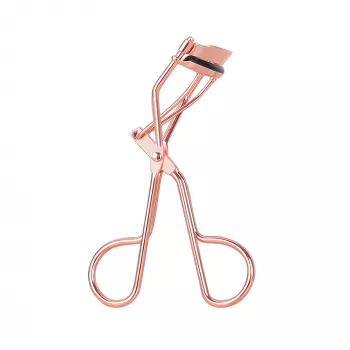
A well-designed eyelash curler can create a wide-awake look without extensions or falsies—if it fits the eye comfortably and clamps evenly. The difference between a frustrating crimp and a clean, lifted curl usually comes down to small details: the curve, the pad, and how smoothly the hinge closes. Below is a practical guide to what to look for in a professional-style curler, how to use it safely for a lasting lift, and simple care tips to keep the pad and hinge working smoothly. For general eye-area hygiene and cosmetic safety guidance, it’s also worth reviewing basics from the American Academy of Ophthalmology and the U.S. Food & Drug Administration.
A professional-feeling eyelash curler isn’t about being complicated—it’s about being predictable. When the clamp closes evenly and the tool sits naturally against your lash line, you get a lifted curve without snagging, pinching, or creating sharp bends.
If you’re shopping for a simple, everyday tool, the Professional Eyelash Curler is a compact option that fits easily into a makeup bag and is designed for quick lifts before mascara.
Fit is the part most people skip—then wonder why one eye curls perfectly and the other looks uneven. A quick check at the mirror takes seconds and can prevent pinches and missed corner lashes.
A good fit should feel stable—like the curler is “hugging” the lash line—without you having to press it into place. If you find yourself shifting the tool repeatedly to catch the same lashes, the curve or width likely isn’t ideal for your eye shape.
Technique matters as much as the tool. The goal is a rounded, flexible lift, not a hard bend. Think “gentle pulses” rather than “one big clamp.”
Tip for symmetry: curl one eye, then immediately curl the other using the same number of pulses and the same timing. Consistency is what makes the curl look balanced, especially when you’re moving quickly.
Most lash-curler “fails” come from a few preventable habits. Adjusting your placement and pressure usually fixes the problem fast.
| Detail to check | What “good” looks like | Why it matters |
|---|---|---|
| Clamp pressure | Closes smoothly with gentle resistance | Prevents kinks and reduces lash stress |
| Curve fit | Sits close to lash base without pinching | Captures more lashes in one pass |
| Pad condition | Matte, soft, not indented or cracked | Cushions lashes for a rounded curl |
| Corner reach | Outer and inner lashes curl with slight angle | Avoids leaving straight “spikes” at the corners |
| Release | Opens cleanly without snagging | Helps prevent pulling or breakage |
For a no-fuss routine, a compact curler can be the easiest way to get a noticeable lift fast. The Professional Eyelash Curler is designed for everyday use: curl on clean, dry lashes, use gentle pulses, then add mascara if you want extra hold and definition.
If you’re building a broader self-care kit, the Electric Massage Hair Growth Comb is another simple tool to keep on hand for scalp massage and a more relaxing routine—separate from eye tools, but useful for everyday grooming habits.
Curl before mascara for a smoother lift and to reduce sticking or pulling. Apply mascara after curling to help set the shape.
Replace the pad when it shows dents, cracks, shine, or stiffness, or if your curls start looking creased. If you curl daily, you may need to replace it more often than occasional users.
Yes—damage can happen if you clamp too forcefully, curl over mascara, or use a worn pad. Gentle pulses, correct placement near (but not on) the lid, and keeping the tool clean reduce the risk.





Leave a comment
You must be logged in to post a comment.