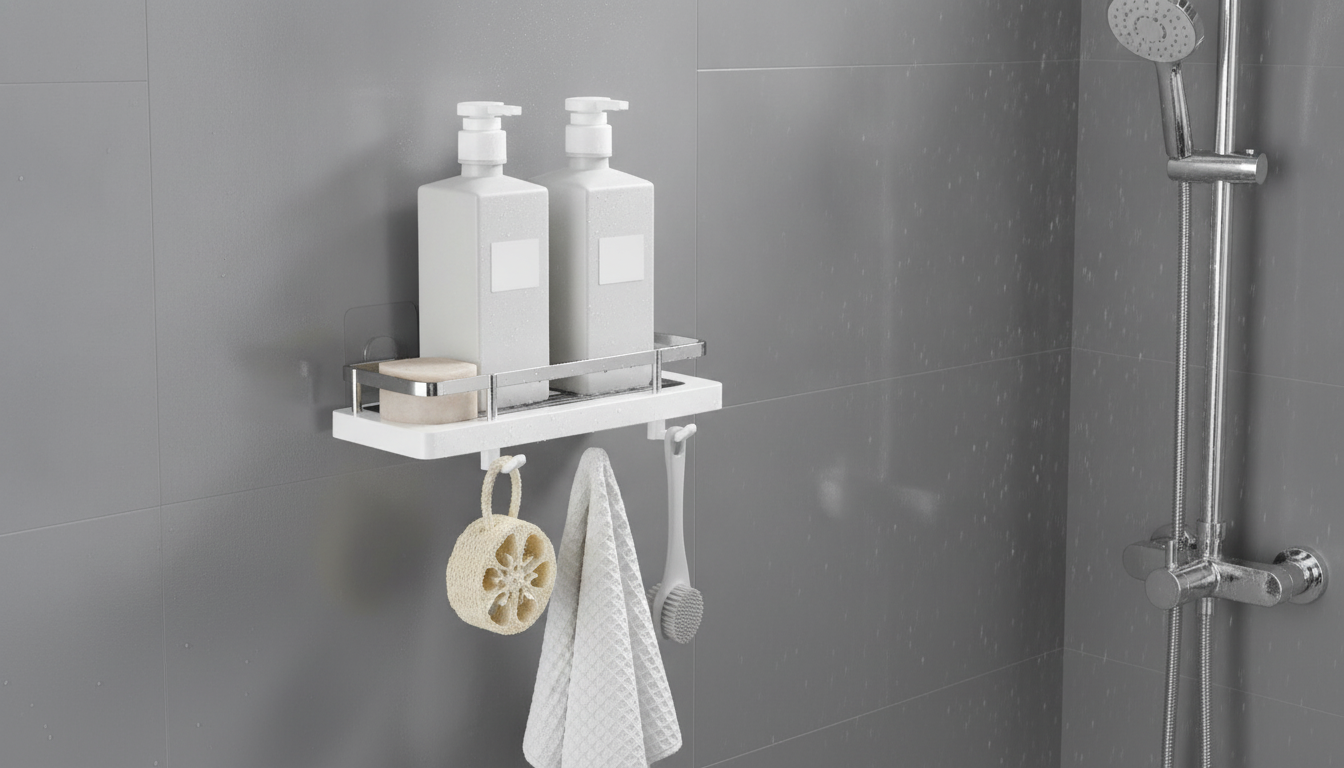
A clutter-free shower feels bigger, cleans faster, and keeps daily essentials within easy reach. A wall-mounted, no-drill shower rack helps lift bottles off the floor and tub edge while avoiding permanent holes in tile or fiberglass. It’s a simple upgrade that can make everyday routines smoother—especially in smaller bathrooms, shared spaces, and rentals where drilling isn’t an option.
When bottles pile up on the tub ledge or shower floor, everything feels messier than it needs to be. A wall-mounted organizer creates a dedicated “home base” for shower staples so they’re easy to see, grab, and put back.
Less clutter underfoot can also support safer movement in wet areas. For slip-and-fall prevention guidance around the home, the U.S. Consumer Product Safety Commission offers practical safety reminders.
No-drill racks rely on a strong bond between adhesive and wall surface. The best results come from smooth, sealed walls where the adhesive can fully contact the surface without air gaps.
If the shower runs hot and steamy, ventilation matters. Keeping humidity in check can help reduce moisture buildup and residue that may weaken adhesion over time. The U.S. Environmental Protection Agency explains how moisture management helps limit mold and dampness issues.
Adhesive mounts can feel “set” quickly, but long-term hold usually comes down to prep. The goal is a clean, dry surface and firm contact across the entire mounting area.
If you’re unsure where to place it, hold the rack against the wall and “test reach” with your most-used bottle. A spot that feels comfortable with wet hands is usually the right one.
A rack is most useful when it mirrors how products are used day-to-day. Instead of stacking items wherever they fit, set up small zones that keep daily basics front and center.
| Item | Best placement | Why it helps |
|---|---|---|
| Large shampoo bottle | Closest to wall / most supported spot | Reduces tipping and strain on the mount |
| Shower gel/body wash | Front edge for quick grab | Most frequently used; easiest access |
| Conditioner/mask | Side or rear | Used less often; keeps daily zone clear |
| Razors/sponges | Separate corner/slot if available | Keeps blades and fabrics off wet surfaces |
Shower storage stays nicer when buildup doesn’t get a chance to harden. A quick rinse and occasional wipe-down keeps surfaces looking clean and helps prevent grime from collecting in corners.
A helpful habit: after deep-cleaning day, dry the wall behind the rack and the rack’s underside so water doesn’t sit in hidden pockets.
Adhesives hold best on smooth, sealed surfaces. Textured tile, porous stone, and uneven grout lines reduce contact area and can lead to lifting; choose a smoother spot or a different mounting method if the wall is highly textured.
Capacity depends on the adhesive system and the wall surface. For best results, follow the product’s guidance, avoid overloading with large pump bottles, and let the mount set before adding weight.
Removal methods vary by adhesive type. Common approaches include slowly peeling from an edge, using warmth to soften adhesive, and cleaning residue with a suitable remover; test a small area first to protect finishes.





Leave a comment