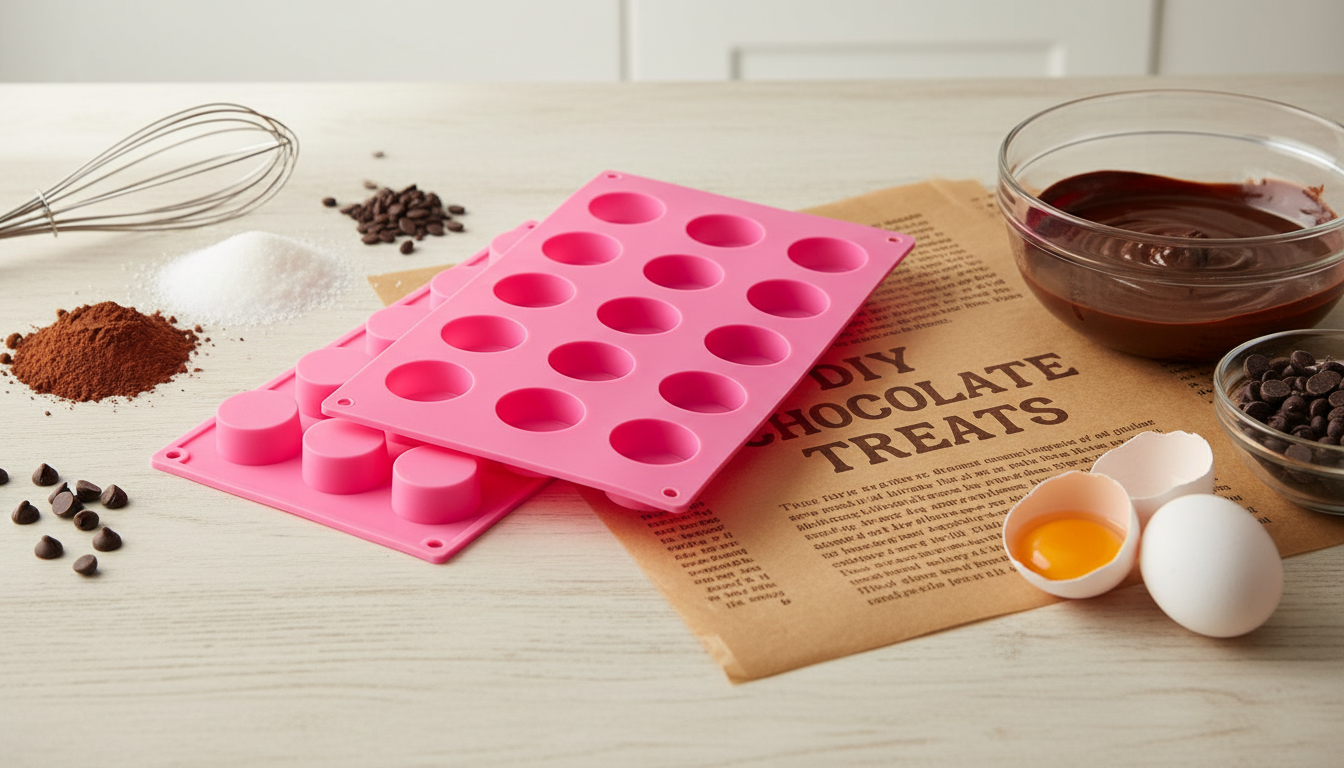
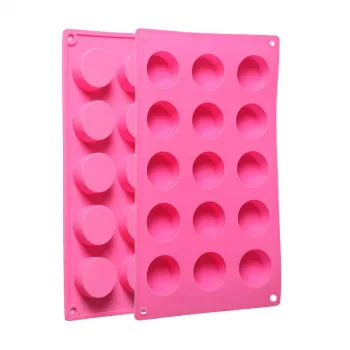
A round silicone mold with multiple cavities makes it easier to batch-produce uniform treats and handmade items with less mess and simpler release. This 15-cavity design suits everyday baking projects (like mini cakes and fat bombs), confectionery work (chocolate rounds, gummies, candy melts), and creative DIY (soap bars, lotion bars, wax melts). The flexible silicone construction helps pop out finished pieces cleanly while keeping shapes consistent from cavity to cavity. For more guidance, see 15+ Pretty Silicone Molds for Making Handmade Cold Process Soap.
What This Mold Is Best For
- Chocolate rounds and candy melts: produces consistent discs for snacking, decorating desserts, or melting into recipes.
- Gummies and candies: portion-friendly cavities help keep sizes even for gifting or storage.
- Mini baked bites: useful for small cakes, brownie bites, or quick breakfast rounds when a full pan is too large.
- Soap making: supports small-batch cold-process or melt-and-pour designs where uniform bars matter.
- Wax melts and DIY crafts: works for scented wax, resin-style crafts (when materials are silicone-safe), and small embeds.
Key Features That Make Daily Use Easier
- 15 cavities for batching: reduces repeat pours and speeds up prep for parties, meal prep, or small-business test batches.
- Round cavity shape: versatile for layered chocolates, filled centers, stamped designs, or simple uniform pieces.
- Flexible silicone body: helps release delicate chocolates and soaps with less cracking or chipping compared with rigid trays.
- Nonstick-style release (with proper technique): typically requires minimal greasing for chocolate and many candies; some baked recipes may benefit from light oiling depending on batter.
- Easy to rinse and re-use: silicone cleans up quickly when residues are handled promptly (especially oils, butter, or fragrance blends).
Quick Specs and Use Cases
- Works across kitchens and craft tables: a single mold can cover dessert prep, candy projects, and DIY soap/wax days.
- Ideal for portioning: round cavities make consistent piece sizes for storage containers, treat bags, and gift boxes.
- Helpful for decorated finishes: the cavity format supports color swirls, sprinkle tops, mica dusting (soap), or layered chocolate effects.
At-a-Glance Guide: What to Make and How to Release
| Project |
Best Practice |
Release Tip |
| Chocolate rounds |
Temper or melt gently; avoid water contact |
Chill briefly, flex mold, push from the bottom |
| Gummies/candy |
Use a dropper or spouted cup for cleaner pours |
Light chill helps; avoid over-freezing |
| Mini baked bites |
Fill evenly; place mold on a rigid tray for stability |
Cool fully before peeling back silicone |
| Melt-and-pour soap |
Spritz with alcohol to reduce bubbles |
Let set completely; flex and pop out |
| Wax melts |
Pour at recommended wax temperature |
Allow full hardening before unmolding |
How to Use It for Chocolate and Candy
- Stabilize before filling: set the silicone mold on a flat baking sheet so it can be moved without sloshing.
- For clean edges: tap the tray lightly after pouring to bring bubbles to the surface; scrape excess from the top if needed.
- Filled centers: pour a thin chocolate shell, chill to set, add filling (nut butter, caramel, ganache), then cap with chocolate.
- Chilling tips: short chilling helps release, but extreme freezing can cause condensation that dulls chocolate; let pieces come to room temperature gradually after unmolding.
- Cleanup: wipe oily residues first with a paper towel, then wash with warm water and mild detergent to reduce lingering scents.
For anyone working with glossy finishes, the biggest upgrade is technique: properly tempered chocolate shrinks slightly as it sets, making release easier and edges sharper. For a quick refresher on tempering fundamentals, see guidance from Cocoa Board. For further reading, see Ultimate Guide to Soap Molds including silicone and custom soap ….
How to Use It for Baking
- Support matters: silicone is flexible; keeping it on a rigid tray prevents spills and helps maintain uniform round shapes.
- Heat distribution: silicone can bake slightly differently than metal; start checking doneness a few minutes early and adjust by recipe.
- Prevent sticking: many batters release well, but sticky high-sugar or low-fat recipes may benefit from a light brushing of oil.
- Cooling step: allow bites to cool until firm before unmolding; peeling too early can tear delicate edges.
- Storage: once fully cooled, store baked rounds in an airtight container; add parchment between layers if tacky.
For additional baking-specific pointers (like why a sheet pan underneath helps), helpful general silicone pan tips are available from King Arthur Baking.
How to Use It for Soap Making
When using any material in contact with food, it’s smart to follow the maker’s temperature and use guidelines and stick to food-safe materials. For general background on regulated food-contact substances, see the U.S. Food & Drug Administration (FDA) — Food Contact Substances resource.
Care, Cleaning, and Storage
When This 15-Cavity Mold Is a Great Fit
Shop In-Stock Picks
FAQ
Is a silicone mold safe for baking and chocolate?
Food-grade silicone molds are widely used for baking and candy making when used within the manufacturer’s temperature guidelines. For best results, set the mold on a baking sheet for stability and avoid direct flame or broiler-level exposure.
Do silicone molds need to be greased?
Many chocolates, candies, and soaps release without greasing, especially when fully set. Some baked batters—particularly sticky or high-sugar recipes—may release better with a light brushing of oil, and cooling completely before unmolding helps prevent tearing.
How do you get chocolate to release cleanly without breaking?
Let chocolate set fully (tempering helps), then chill briefly and flex the mold instead of pulling the pieces out. Push from the bottom of each cavity and avoid over-freezing, which can cause condensation and make chocolate more prone to scuffing.
Recommended for you



Leave a comment