79% off on product page · save $8.48
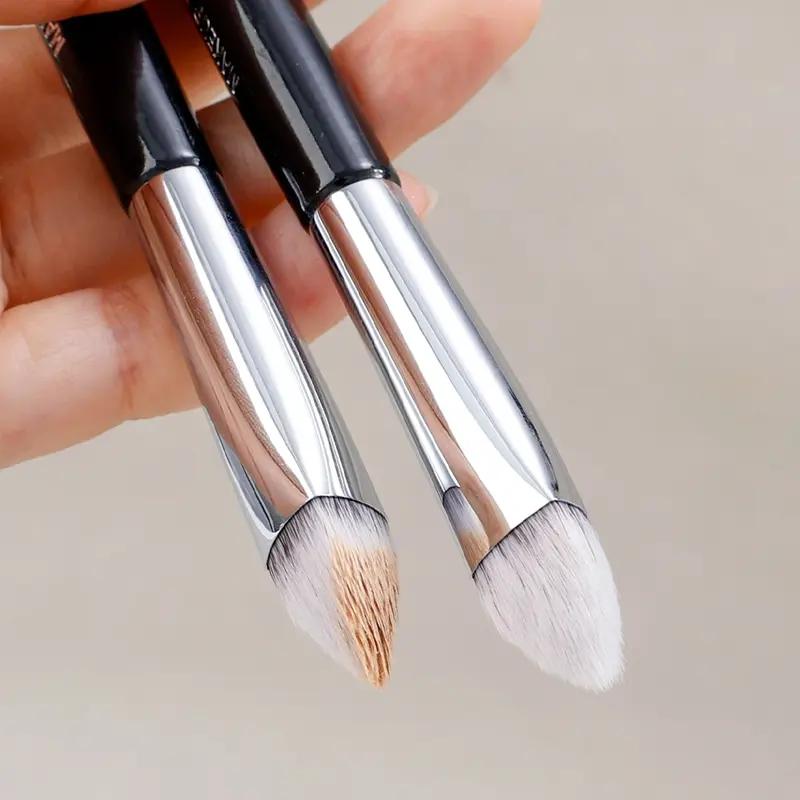
Professional Triangle Cone Makeup Brush: Tips and Care

A tapered shape can help you direct product toward a small area instead of spreading it across a wide section of your face. You might try it beside the nose, around the inner corners of the eyes, or wherever you want to work in short, controlled movements. These are possible uses, not a guarantee that one brush will produce the same result with every formula.
For a broad sweep of powder across the cheeks or forehead, a larger face brush may feel quicker and easier. A targeted brush serves a different purpose: placing a little product where you want it, then softening the edges. You do not need to replace your everyday brushes to make room for one. Our team suggests choosing the tool according to the size of the area you are working on.
Before applying makeup, hold the brush as you normally would and make a few light motions against clean skin. Notice whether you can guide it comfortably without pressing hard. That simple test can tell you more about its place in your routine than the word “professional” on its own.

Begin with less product than you expect to need. A thin layer gives you room to build, while too much product in a small area can take more effort to blend away. If you are using powder, tap lightly to place it, then use gentle, short strokes to soften any visible edge. You can step back from the mirror between layers to see whether the placement still looks balanced.
With a cream or liquid formula, pay attention to how the brush picks up and releases the product. Some combinations blend smoothly; others may leave streaks or move the makeup underneath. If that happens, try a lighter touch, use less product, or switch tools. Clean the brush appropriately after using a wet formula rather than leaving residue in the brush head.
A simple guide to targeted brushwork
| Area | Starting technique | What to watch for |
|---|---|---|
| Sides of the nose | Place a small amount, then blend outward. | A hard line along the edge. |
| Under-eye area | Use a light touch and minimal product. | Dragging delicate skin. |
| Small areas needing detail | Build coverage in thin layers. | A result that looks different in natural light. |
If you are applying makeup close to your eyes, keep your motions gentle and avoid getting product in your eyes. Stop using a product that irritates your skin or eyes. The U.S. Food and Drug Administration’s cosmetics guidance is a useful resource for general information about cosmetic safety.
Featured in this guide
Professional Triangle Cone Makeup Brush
“Professional” does not mean that one brush suits every task. Makeup artists and home users alike choose tools based on the formula, the area of application, and the finish they want. Your technique matters, too: even a well-chosen shape works best when you can control the amount of product and blend without heavy pressure.
As you use the Professional Triangle Cone Makeup Brush, consider three practical questions. Can you place product where you intend to? Is the brush comfortable to hold through several small movements? Can you soften the edges with a light hand? Those observations help you decide whether it earns a regular spot in your routine without relying on assumptions about unlisted materials or features.
It can also help to give each tool a clear job. Keep a larger brush available when you want broad application, and reach for a more targeted brush when a smaller area calls for attention. If you are organizing a wider getting-ready routine, keep grooming tools for different tasks separate; for example, our Electric Massage Hair Growth Comb is a hair tool, not a substitute for a makeup brush. Use and care for each tool according to its intended purpose.
Regular cleaning helps prevent old makeup from building up on your brush and affecting the next application. It is especially worth paying attention when you switch between products or use a brush near your eyes. A clean tool also makes it easier to judge how a formula applies, rather than working around yesterday’s residue.
For a gentle routine, wash the brush head with a cleanser suitable for makeup brushes, rinse it thoroughly, and reshape it. Let it dry completely before using or storing it. Avoid scrubbing aggressively or leaving a damp brush in a closed container. If hygiene is a concern, do not share makeup tools; having your own brush makes it easier to keep track of when it was last cleaned.
You may find that your preferred cleaning schedule changes with how often you wear makeup and which formulas you use. The useful habit is to notice buildup and clean the brush before it interferes with a smooth, controlled application.
The Professional 13-Piece Makeup Brush & Sponge Set for Flawless Beauty is another cleaning kit option to compare with the featured cleaning kit; verify fit, materials, and included hardware against the same car or use case.
1
Prepare the brush for the tips care check
2
Clean the brush with the material-approved method
3
Remove cleaner residue from every brush surface
4
Let the brush dry completely before use
Professionals use a range of brands rather than one universal choice. When you choose a brush, focus on whether its shape works for your formula and application area, and whether it gives you comfortable control.
A shaped brush may help you place and blend makeup in targeted areas, such as beside the nose. Its best use depends on the particular brush, your formula, and the technique you prefer.
There is no single best brush for every task. Choose a shape that suits the area and formula, then assess its control, comfort, blending, and ease of cleaning.






Leave a comment
You must be logged in to post a comment.