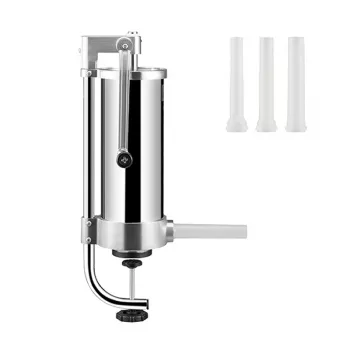
A vertical sausage stuffer helps pack seasoned ground meat into casings with steady pressure and better control than improvised methods. With a 3L canister and three tube sizes, this style suits small-batch homemade sausage, snack sticks, bratwurst-style links, and more—while keeping filling consistent and reducing air pockets.
A vertical stuffer uses a canister and piston to push a chilled meat mixture through a stuffing tube and into a casing. Because the flow is driven by controlled pressure (instead of an auger), the fill tends to be smoother and more uniform—helping prevent casing blowouts and patchy density.
The vertical orientation is a practical win in most home kitchens. It typically takes up less counter space than horizontal designs, and the upright canister stays stable while cranking. That stability matters when you’re trying to keep a steady pace, maintain even pressure, and avoid trapping air.
Compared with pushing meat back through a grinder to stuff, a dedicated stuffer can help keep the mixture colder and reduce fat smearing. A cleaner workflow also becomes easier to maintain: mix → chill → stuff → link → rest/cook. That sequence supports better texture and more consistent links.
A 3L canister is sized for practical home batches—enough volume to produce a meaningful amount of sausage without feeling oversized or difficult to store. It’s a sweet spot for occasional sausage-makers, meal-prep households, and anyone who wants better control without committing to a large, heavy unit.
Three liters also makes it easy to split a batch into multiple runs. One load can become classic breakfast links, the next can take a spicier seasoning blend, and another can be reserved for smaller casings or snack-stick style projects. For best results, chill the canister and meat mixture before stuffing; colder fat stays distinct, and the crank typically feels easier under load.
If you’re prepping for a larger cookout, plan on reloading. Between loads, keep the remaining mixture covered and refrigerated so it stays food-safe and maintains the right texture.
| Canister size | Typical home use | Reload frequency for larger batches |
|---|---|---|
| 3L | Small-to-medium batches for fresh sausage, brat-style links, or snack-size casings | Moderate (may require multiple loads for big cookouts) |
| 5L+ | Bigger batches, frequent sausage-making | Lower (fewer reloads) |
Having multiple stuffing tubes isn’t just a nice add-on—it directly affects how smoothly meat flows into the casing. Matching tube diameter to casing size helps reduce back-pressure, which can cause messy blowouts and uneven packing.
Wider tubes are commonly used for larger casings (think brat-style or Italian-style links) to keep the flow steady and reduce strain while cranking. Narrower tubes are better for smaller casings and snack sticks, where control is more important than speed and the casing wall is less forgiving.
Aim for a tube that fills the casing without overstretching it. Overstretching increases the chance of blowouts and can make it harder to twist uniform links.
A good stuffing experience depends on stability, sealing, and easy cleanup. A stable base (and secure mounting if the design supports it) reduces tipping and keeps cranking smooth—especially with thicker mixtures or colder batches.
Air release and a good piston seal help reduce trapped air pockets that create gaps or weak spots. Fewer air pockets also improves how links cook, since large voids can lead to inconsistent texture.
Food-contact materials should be easy to sanitize: smooth surfaces, removable parts, and minimal crevices. Simple disassembly matters more than it sounds—when cleanup is quick, it’s easier to maintain better food safety habits after every batch.
For food handling guidelines and safe storage times, refer to the USDA Food Safety and Inspection Service sausage safety resource. For additional processing and safety references, the University of Wisconsin-Madison Extension meat processing and safety resources are also helpful.
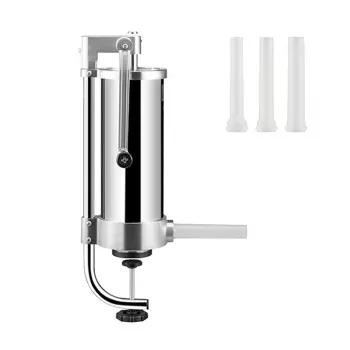
Vertical Sausage Stuffer with 3L Capacity & 3 Stuffing Tubes is a compact vertical design suited for small-to-medium batches, with three tube sizes for different casing types and snack-stick projects. It’s a practical pick for improving consistency, reducing mess, and keeping the meat mixture colder during stuffing compared with improvised methods.
| Item | Details |
|---|---|
| Capacity | 3L |
| Stuffing tubes | 3 included |
| Style | Vertical canister stuffer |
Three liters refers to the canister volume, so the finished output varies with meat density and casing choice. In practice, a 3L canister is well-suited to small-to-medium home batches, while larger cooks may require multiple loads.
Use the narrower tube for snack sticks and other smaller casings to keep control and avoid overstretching. Use a wider tube for larger links to reduce back-pressure and help the mixture flow smoothly.
Keep the mixture cold, pack the canister in layers and tamp gently, then prime the tube before sliding on the casing. Crank steadily and guide the casing with light back-pressure to help the fill stay tight and even.





Leave a comment
You must be logged in to post a comment.